Details
Once Company Changes have been made, CAS 360 users are able to proceed to the Document Production screen to prepare documents.
Document Production is where users are able to:
- See a list of all changes that are being made
- Preview the Document Suite
- View and change all document options
- Select which documents to prepare and where the documents will be delivered.
Changes Selected
The left-hand column of the Document Production screen will outline all the company changes CAS 360 will prepare in the current set of documents.
CAS 360 will outline details such as the date of the change, contacts involved in the change and even where foreign currency has been used.
Users can remove company changes from the document production screen by clicking  beside the change.
Reorder Documents
The order of documents can be easily changed
Simply drag and drop the documents in the desired order.
Quickly correct missing Information.
Missing Information? Overlooked including an email address for someone? CAS 360 simplifies the process of adding any missing contact information through a user-friendly pop-up window within your document production interface.
Never miss crucial details for signatories again! Our cutting-edge notification system within the document production screen promptly notifies you of any omissions. With just a single click on the notification link, seamlessly input the required information without interrupting your workflow.
Forms to Prepare
CAS 360 will automatically select the required documents for the selected changes.
Users are able to select or deselect documents at will by clicking the switch icon.
To preview a document, click the document name.
Select the  icon to change any of the document settings. Different options will appear in relation to the type of document it is.
| Document Type | Settings |
| Registers |
|
| Shareholder Register |
Flag |
| Share Certificates |
|
| Share/Unit Transfer Forms |
|
| Meeting Minutes |
Flag |
| Application of Shares and Notice of Beneficial Ownership |
|
| Document Date |
The date appearing on the document. Select |


Send to
Select any contact from the Global list of contacts in CAS 360 to email the set of documents to. CAS 360 will automatically send the documents to the selected contact(s) via email.
Multiple contacts are able to be selected.
Users can view all sent emails from the Messages screen
Set the email sender name and reply to address for emails sent from CAS360 with the Email Settings Screen.
Icons
|
If the documents on the document production screen have been moved to be in a different order, the new order can be saved. For more information, click here. |
|
|
Any company notes entered for the company can be reviewed by opening the company notes pop-up. New notes can be added as well. |
|
|
CAS 360 will automatically email the chosen documents to the Contact appearing under Send to (The status of the document in the Document screen will be saved as Sent to Client) This option will be inactive if there are no contacts in the Send to Field or there are validation errors with the ASIC form. |
|
|
Allows users to download the chosen documents into a single PDF file. This will also save the set of documents to the document screen ready for lodgement. (The status of the document in the Document screen will be saved as Prepared) This option will be inactive if there are validation errors in the ASIC form |
|
| Upload a file from outside of CAS 360 to be included as part of the Forms to prepare | |
| Close the Document Production Screen |
Download all documents in separate PDF files
When preparing documents in the Document Production screen, simply click beside Download All and select Download all documents in separate PDF files
This will generate each document in your document production screen into its own individual separate pdf. If you want all the documents combined into a single pdf, simply click the download all button itself.
Automated Document Reminders
When preparing documents in the Document Production screen, simply click beside Download All or Send All and select Set-up automatic document reminders.
See Automated Document Reminders for more information
Upload documents into your document production screen.
Upload a file from outside of CAS 360 to be included as part of the Forms to prepare, click.
Alternatively, the Document Production screen has an inbuilt Drag and Drop feature which allows you to drag any document file from your computer and drop it right into your document production screen.
Try dragging and dropping in multiple documents at a time! CAS 360 also supports the uploading of multiple documents.
Document Templates
Select which templates to use for the set of documents.
The menu will display a list of Company Labels which have been attached to any uploaded document template.
See Document Templates for more information.
Add Company Contacts
After sending your documents, you have the option to add the email contacts you have entered as your default company contacts.
These defaults contacts will then be saved under General Details | Company Contacts.
For example,
Select another contact into the Client Emails field.
After you select Send All and Send the documents, the following screen will display for you to add these contacts as your default contacts if they have not been added already.
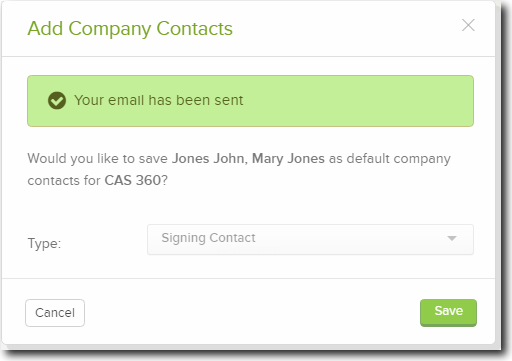
If you select Save, these contacts will be added as Signing Contacts under General Details | Company Contacts.
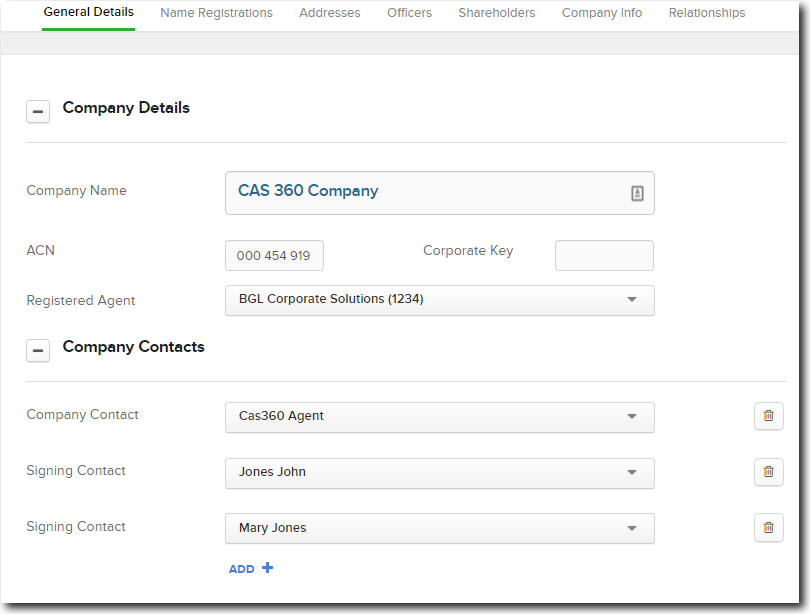
Next time you prepare documents that require a signature, these contacts will be selected by default.
You can have multiple contacts for the same contact type.